Laser cut appliques are the easiest way to do raw edge fusible applique. No Drawing, No Cutting, No Worries!
Laser cut applique starts with the fabric - I use mostly Hoffman batiks. A fusible is applies (I use Soft Fuse Premium), and then the laser cutter does its magic. You get an applique that is raw edge, but the edges are sealed with the laser cutter, so minimal fraying results. You just peel off the paper backing, position on the background fabric, and fuse the ap- plique in place with an iron.
You can also get much more detail with the laser cutter than you can cut yourself, along with more accuracy, and of course you save a lot ot time and frustration.
Larger appliques will come folded around cardstock. Press flat with a medium temperature iron before removing paper backing.

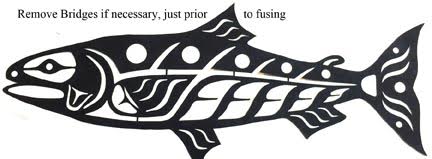
Some appliques have bridges. This salmon has four bridges to stabilize the piece for shipping. Snip these away after the paper back is removed, just before fusing.
I use Superior Threads Bottom Line, Medium Brown

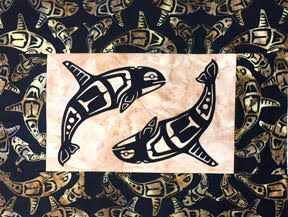
After removing the paper, position the applique(s) on the background. Make certain
the appliques are just like you want them. Lightly fuse with no steam, then fuse with steam to activate the fusible. Do not “scrub,” just lift the iron to move it. Steam for a few sec- onds over the entire applique.
You can either Fuse first then quilt the piece, or Quilt your piece, then fuse the applique.
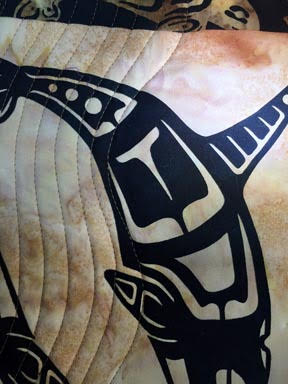
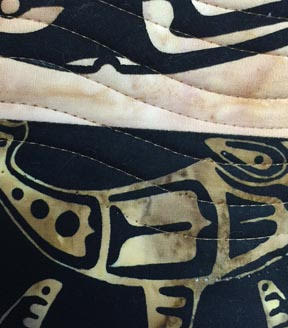
If you do not free motion quilt, no worries - you can easily quilt these with a walking foot and a gentle wavy line, or your machine may even have a programmed stitch that you can use. I have used the serpentine stitch, with an elongated stitch length - I used 2.5 on this sample. I stitched the quilt with the serpentine stitch, then fused the laser cut applique. I have hand washed this to see how it holds up, and I am happy with the results.
1. Fuse then Quilt
using walking foot and a gentle wave

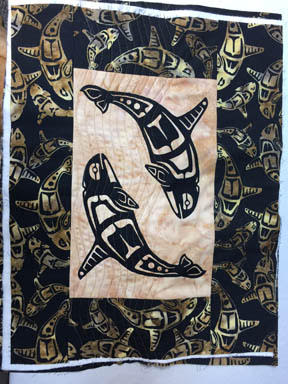
2. Quilt then Fuse
using walking foot and a Serpentine Stitch

Sandwich the quilt with batting and backing. Mark a gentle wave using your favorite method. I like a chalk-o-liner filled with Miracle Chalk. You could use a sliver of soap, a hera marker, or whatever you like.

A tip on sandwiching: For a small project like this, I use a cotton bat- ting, and just iron the sandwich together - I don’t use any spray baste or pins. For a larger project, I use spray baste but I still use the iron to press the sandwich together.
Use your walking foot and about a 2.5 stitch length to stitch the wavy line. If you are a free motion quilter, you can also do this free motion.
Begin with one backstitch. Take your time and just stitch along the drawn line.

Stitch parallel lines, using the left side of the walking foot as a guide to help stay parallel. There is a 1/4” gap between the walking foot and the stitching line.

Wavy lines have a tendency to flatten as you add more and more. To prevent this, increase the distance at the peak of the wave and decrease the distance at the trough of the wave for a couple of stitched lines to get the curve back.
After qulting a dozen or so lines, the quilt may get wonky (that’s a technical term). If so, just take it over to the ironing board and press from both sides to get it flat again.

Now it is flat again and ready to be quilted
If your bobbin runs out, just start again 1” be- fore the end, matching the stitching as you sew that inch.
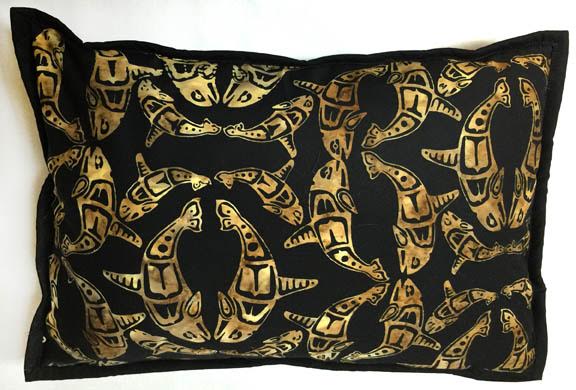
Here is the project finished and made into a pillow.
To make the pillow:
1. Square up the quilt top.
2. Cut a pillow back the same size as the quilt.
3. Install the binding on the right side of the quilt. Press the binding flat, and then press the binding over, mitering the corners.
4. Prior to stitching the back of the binding, pin the pillow back in place, then stitch the back of the binding, leaving a 6” opening. You can stitch by machine or by hand.
5. Stuff the pillow, then stitch the final 6” of the back of the binding.

Tip: If your lasercut starts to peel off the background, you can always press it again, or just just a drop of fabric glue to adhere it. I like Alenes fabric fusion pen.
This shows the pillow back.
For Questions, please contact Lisa Moore moorelisa@aol.com
Copyright © 2015 by Lisa Moore